
Today I made three cards using the Sketched Butterflies Bundle from Stampin’Up! You’ll never run out of butterfly possibilities with the Sketched Butterflies Bundle! These dies and stamps are great for nature, garden, and all-occasion cards and paper crafts. Use the larger dies to cut around some of the Sketched Butterflies stamps. Or place a couple of the smaller butterflies above one of the sentiments, slightly folding the wings to add extra depth and dimension. Whatever you make, this bundle is sure to add fluttery flair to your creations!
The instructions are below for these projects. If you want to watch the step by step video, here it is.
If you would like to try this project, please visit my store for any supplies you need. Sign up for my newsletter and receive FREE tutorials every month.
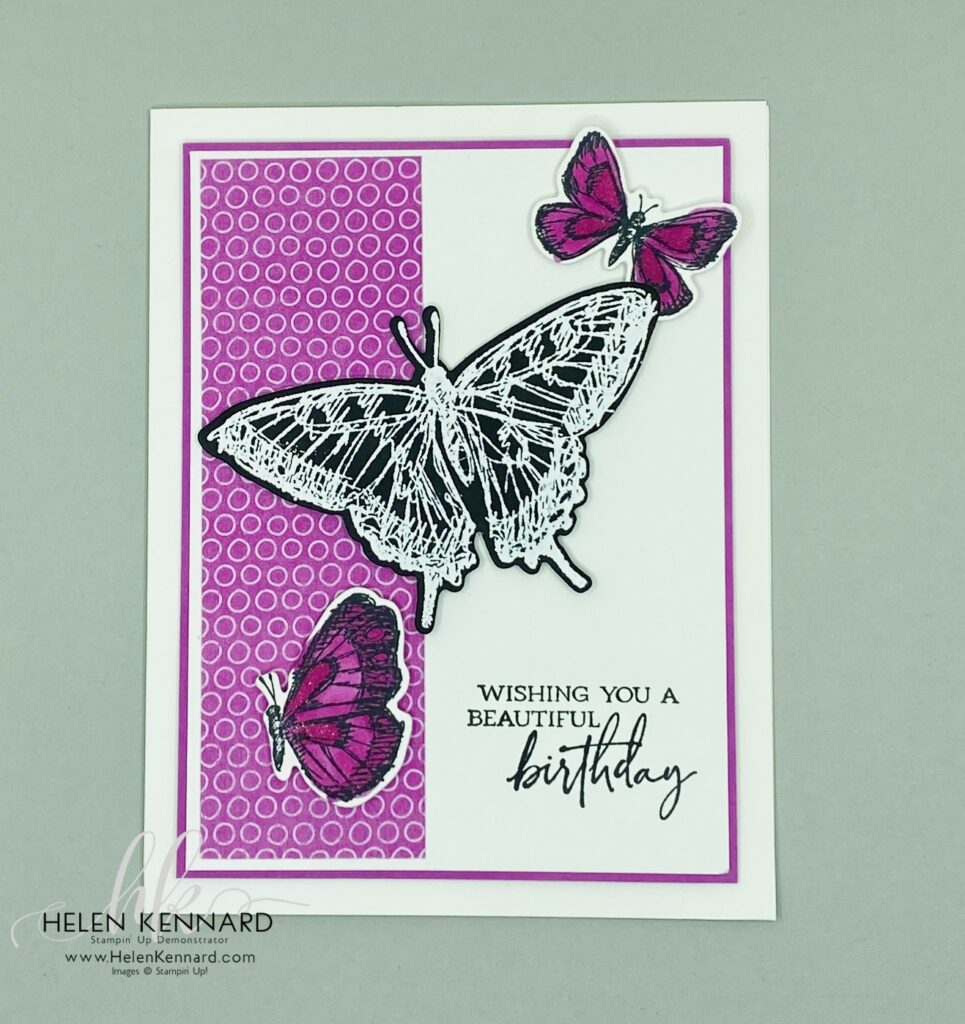
Sketched Butterflies Card #1
Stamp Set: Sketched Butterflies
Paper: In Color Designer Series Paper, Basic White Thick Cardstock, Basic White Cardstock, Basic Black Cardstock, Petunia Pop Cardstock
Ink: Momento Ink Pad, Versamark Ink Pad, Blends: Petunia Pop Blends
Embellishment: Stampin’ Dimensional, Mini Glue Dot, In Color Shimmer Gems, White Embossing Powder
Tools: Stampin’ Cut & Emboss Machine, Sketched Butterflies Dies,
Directions:
- Cut Basic White Thick Cardstock to 5-1/2″ x 8″. Score at 4-1/4″.
- Cut Basic White Cardstock to 3-5/8″ x 4-7/8″ and stamp sentiment on bottom right.
- Cut Designer Series Paper 1-1/2″ x 4-3/4″ and adhere to the Basic White layer with Seal. Adhere this layer to the base with Dimenionals.
- Stamp the smaller butterflies in Memento ink on Basic White scraps. Color with Blends, die cut and adhere to the card front using Dimensionals.
- Stamp the large butterfly on Basic Black Cardstock using Versamark. Heat emboss with White Embossing Powder. Die cut and adhere to the card front using Dimensionals.
- Embellish card front with Shimmer gems.
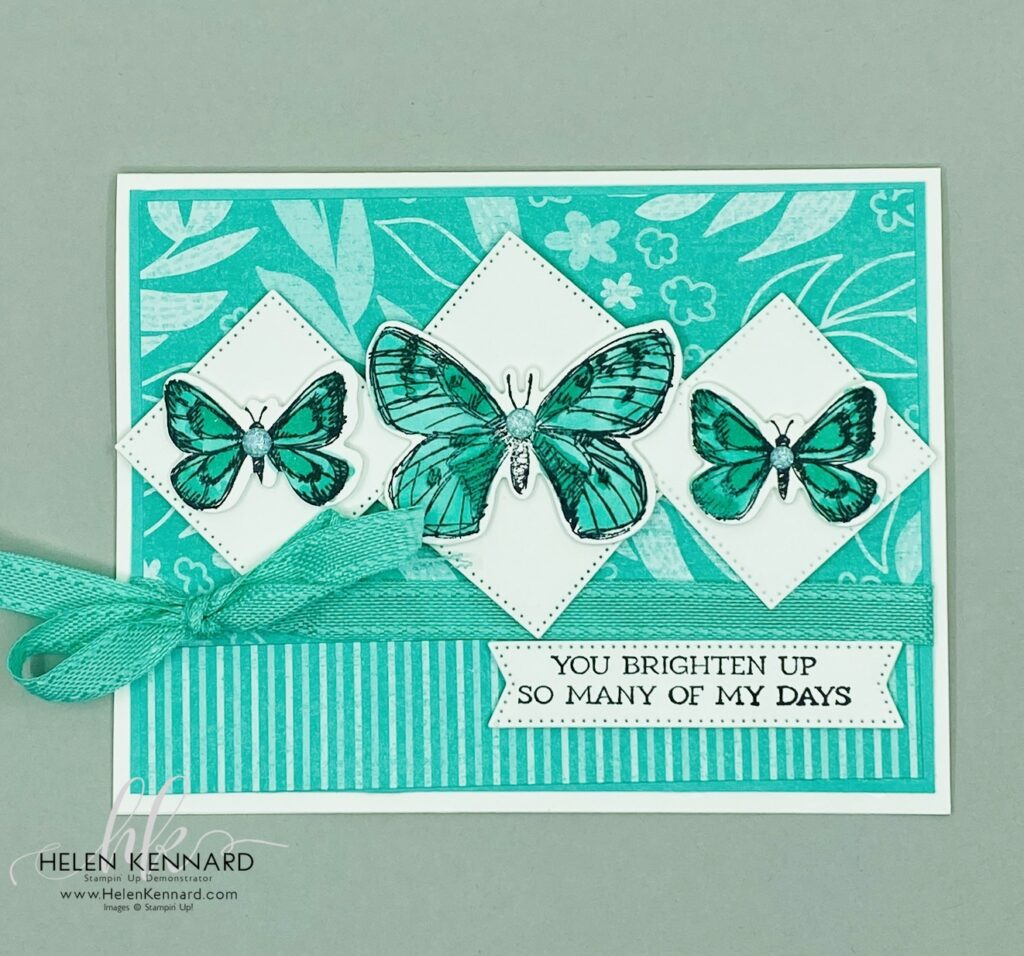
Sketched Butterflies Card #2
Stamp Set: Sketched Butterflies
Paper: In Color Designer Series Paper, Basic White Thick Cardstock, Basic White Cardstock, Shaded Summer Cardstock
Ink: Momento Ink Pad, Blends: Shaded Summer Blends
Embellishment: Stampin’ Dimensional, Mini Glue Dot, In Color Shimmer Gems, Shaded Summer Ribbon
Tools: Stampin’ Cut & Emboss Machine, Sketched Butterflies Dies,
Directions:
- Cut Thick Basic White Cardstock to 5-1/2″ x 8″. Score at 4-1/4″.
- Cut Shaded Summer Matt to 4″ x 5-1/4″ and Adhere Designer Series Paper Cut at 3-7/8″ x 5-1/8″ and then cut off 1″ and flip it over. Adhere to Shaded Summer Matt.
- Wrap ribbon around the mat and secure with a knot/bow.
- Die cut squares with the Stylish Shape Dies. Adhere to the card front using Dimensionals.
- Stamp butterflies in Memento Ink on Basic White scraps. Color using the Summer Splash Blends. Die cut and adhere to the squares using Dimensionals.
- Stamp sentiment in Memento ink on Stylish Shapes Banner and adhere to the card front using Dimensionals.
- Embellish card front with Shimmer gems.
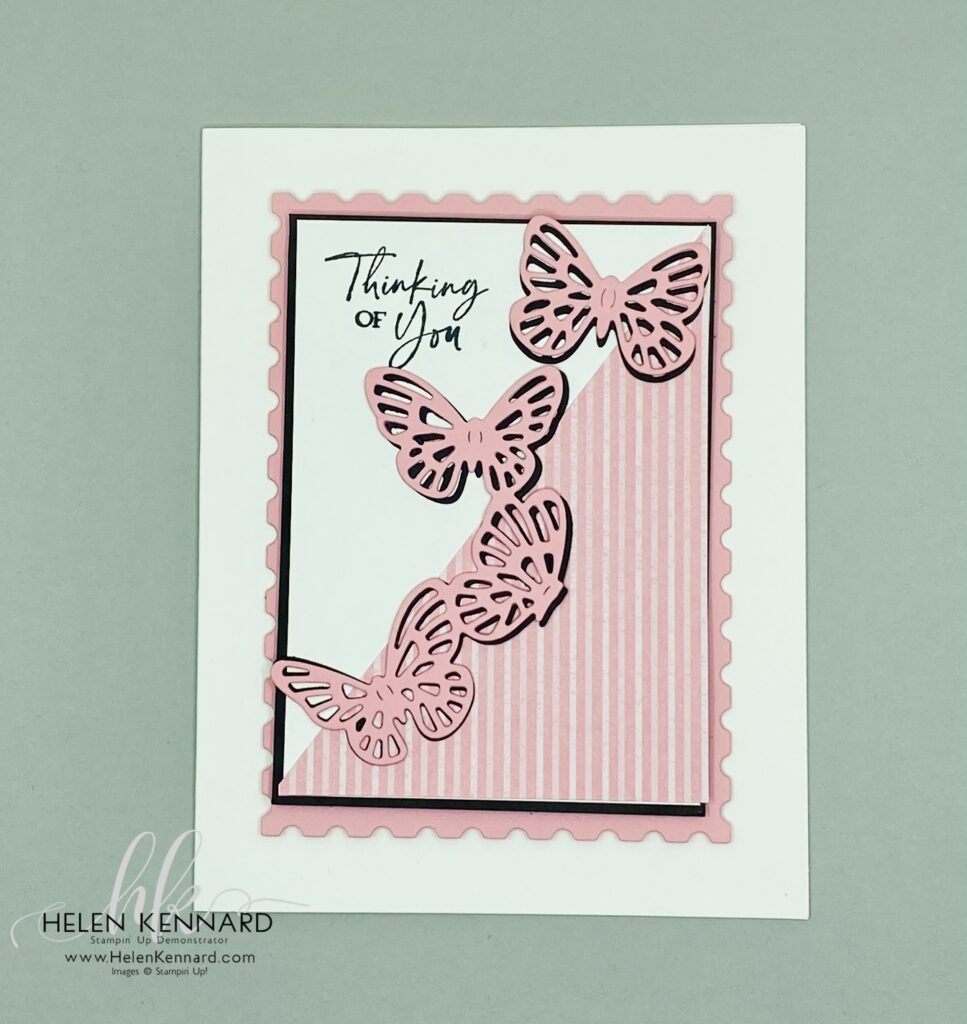
Sketched Butterflies Card #3
Stamp Set: Sketched Butterflies
Paper: In Color Designer Series Paper, Thick Basic White Cardstock, Basic White Cardstock, Basic Black Cardstock, Pretty In Pink Cardstock
Ink: Momento Ink Pad
Embellishment: Stampin’ Dimensional, Mini Glue Dot, Adhesive Sheets, In Color Shimmer Gems
Tools: Stampin’ Cut & Emboss Machine, Sketched Butterflies Dies, Perennial Postage Die
Directions:
- Cut Basic White Thick Cardstock to 5-1/2″ x 8″. Score at 4-1/4″.
- Cut Basic White to 2-7/8″ x 4″ and stamp sentiment in upper left corner with Memento Ink.
- Cut Basic Black Cardstock to 3″ x 4-1/8″. Adhere Basic White layer to the Basic Black Matt.
- Cut Designer Series Paper to 2-7/8″ x 4″. Cut in half on the diagonal. Adhere to the Basic White piece using seal.
- Adhere Basic Black Matt to Pretty In Pink die cut with Perennial Postage Die using Dimensionals. Adhere to the card front using Dimensionals.
- Die cut butterflies from Basic Black Cardstock and Pretty In Pink Cardstock with Adhesive Backed Sheets on both. Adhere Basic Black layer to card front first and then adhere the Pretty In Pink layer by slightly offsetting it.
- Embellish card front using Shimmer Gems.
Let’s Stay Connected:
Join me Live every Wednesday night at 7pm EST on FaceBook or YouTube.
You can Shop My Store Here
Join My Team Here.
#Stampinup #helenkennardcom #Handstampedcards #stampinuptutorials #sketchedbutterflies

Leave a Reply