
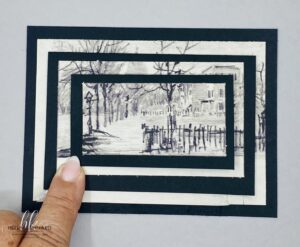
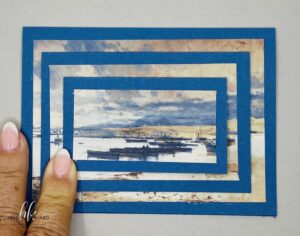


Today I made a Three Layer Fun Fold Card using the Beautiful Gallery Designer Series Paper from Stampin’Up! This old-world art gallery designs add dramatic and artistic details to your projects. The Three Layer Fun Fold Card is so fun and easy to make.
The instructions are below for this project. If you want to watch the step by step video, here it is.
If you would like to try this project, please visit my store for any supplies you need. Sign up for my newsletter and receive FREE tutorials every month.
Three Layer Fun Fold Card
Stamp Set: Grateful Blessings
Paper: Misty Moonlight Cardstock, Basic Beige Cardstock, Beautiful Gallery Designer Series Paper
Ink: Misty Moonlight Ink Pad
Embellishment: NA
Tools: Trimmer,
Directions:
- Cut Misty Moonlight base 8″ x 5 1/2″ and score at 4″. Cut second layer 6″ x 4 1/2″ score at 3″. Cut third layer 4″ x 3 1/2″ score at 2″.
- Cut Basic Beige cardstock 5″ x 3 1/2″, 4 1/4″ x 2 7/8″ and 3″ x 1 1/2″. Stamp sentiment on first and second layer. Adhere to inside of each card.
- Take the Designer Series Paper and choose what the focal point will be and cut around it, making sure the orientation of your card base. Then cut your first layer 5″ x 3 1/2″, second layer at 4″ x 2 1/2″ and top layer 3″ x 1 1/2″. Adhere first layer to the card base, Adhere second card base on top, centered. Add the Designer series Paper to the second layer. Then top Card Base with third piece of Designer Series Paper.
Let’s Stay Connected:
Join me Live every Wednesday night at 7pm EST on FaceBook or YouTube.
You can Shop My Store Here
Join My Team Here.
#Stampinup #helenkennardcom #Handstampedcards #stampinuptutorials #threelayercard #gratefulblessings #beautifulgallery

Leave a Reply